Studies show that between 70-80% of consumers research a business online before visiting in person or making a purchase. That means having a website is as necessary for companies today as having a phone number.
Maybe you’re starting a new business venture or developing your personal brand. Or, maybe you’re looking to update your company’s outdated website. Whatever the case, creating a new website can feel overwhelming, particularly without technical expertise or a budget for web developers.
To alleviate any frustration you might feel, we’ve put together a comprehensive, step-by-step guide to creating a website. Best of all, you won’t need a coder, web designer, or big budget to create one — you’ll just need to follow the nine steps below.
1. Choose your website platform.
The first thing you’ll need to decide is whether you want to create a website using a website builder or a content management system (CMS).
Both provide the out-of-the-box features, pre-designed templates, and extensions required to create a custom site without coding, but they offer different experiences for creating and managing a website.
Website builders provide everything you need to launch a site. You get website building tools, hosting, domain registration, SSL certification, templates, and support in one place, often for a low monthly rate.
This ease of use and pricing appeals to many site owners; however, free website builders as well as the more expensive alternatives tend to be limited in flexibility. For example, you can’t add your own custom code, or drag and drop elements anywhere on your posts and pages with a website builder.
If you want more control over the functionality and appearance of your site, use a CMS. A CMS will provide the content management features, advanced functionality, and customization options required to build larger, more complex sites.
If you've decided that a CMS is the best option for your business, consider the software, ease of use, customizability, security, and pricing of different platforms to narrow down your selection.
The best CMS system for your business will align with your site's needs and goals. For instance, do you need a platform that allows you to add your own custom code or one that supports multiple languages? Would you like a proprietary CMS to help share the responsibility of protecting and maintaining your site, or would you prefer an open-source CMS? You might also narrow your list by comparing the selection of templates and add-ons offered by each system.
WordPress, for example, is a popular open-source CMS that provides thousands of themes, plugins, and modules for customizing your site. In exchange for this flexibility, you will have to spend more time and money downloading, installing, and maintaining these extensions. On the other hand, WordPress alternatives like the CMS Hub provide more built-in functionality, app integrations, and security features so you can focus on creating web content and attracting leads.
Once you’ve chosen the best CMS platform for your needs, continue to step two.
2. Select a hosting plan.
Web hosting is a service that enables individuals or businesses to run a website on the Internet. The service provider, known as a web host, will store your website files on a secure server that it keeps up and running, and then deliver and display that web content to visitors who type in your URL in their browser.
The steps for selecting a hosting provider differ depending on whether you chose a proprietary or open-source solution above. A proprietary solution will include web hosting in its pricing package. So you'll simply need to select the plan with the bandwidth, storage, and other features that suit you best.
For example, Wix offers limited bandwidth and storage on its free plan so you'll have to upgrade to its Unlimited plan for unlimited bandwidth and 10GB of storage.
If you opted for an open-source solution, you'll have to find your own hosting provider, which will take take time and lots of research. There are hundreds of web hosts on the market. Each one might offer different types of hosting, including shared hosting, VPS, and dedicated hosting. Let's briefly look at the differences below.
Virtually every web host offers shared hosting. Shared hosting is the most popular type of hosting, particularly among new site owners, because it's the cheapest option. However, because your website has to share the same server with many other websites, it can't support high volumes of traffic and is most vulnerable to hackers and other security threats.
VPS hosting is a pricier alternative because it isolates server resources for your site specifically. That means your site will be able to handle higher volumes of regular traffic. If you'd rather not share a server with any other website, you can upgrade to dedicated server hosting.
Once you've decided what type of hosting you need, you can pick a provider. DreamHost, Host Gator, and Bluehost are among the most popular third-party providers and offer free domain registration for the first year. That will simplify the next step in building a website.
3. Get a domain name.
No matter what type of website platform you chose to build your site, you'll likely have to purchase a domain name. Some website builders like Weebly offer a free subdomain for your site, but you'll want to upgrade to a custom domain.
One of the easiest ways to appear more professional and legitimate as a company is to pay for a domain name. Imagine you were looking for a freelance writer. Are you more likely hire me if my website address is carolineforsey.weebly.com or carolineforsey.com? An extension like "weebly.com" can confuse visitors and dilute your brand identity. Worst case scenario: a visitor might assume you can’t afford a premium hosting service or custom domain, and draw conclusions that your business is not fully established.
Fortunately, purchasing a domain name is typically inexpensive — even for those who sign up for hosting plan that does not include free domain registration for year. There are two different approaches you can take.
You can visit a domain site, purchase and register a domain name there, and then connect it to your hosting account. Both Godaddy.com and Namecheap.com are cheap, secure, and effective options for buying a domain name, with added benefits such as SSL security and office 365.
Or you can complete the entire domain name search and registration process on your hosting provider’s site. For example, after signing up for a Bluehost plan, you’ll be taken to this page to sign up with a domain name.
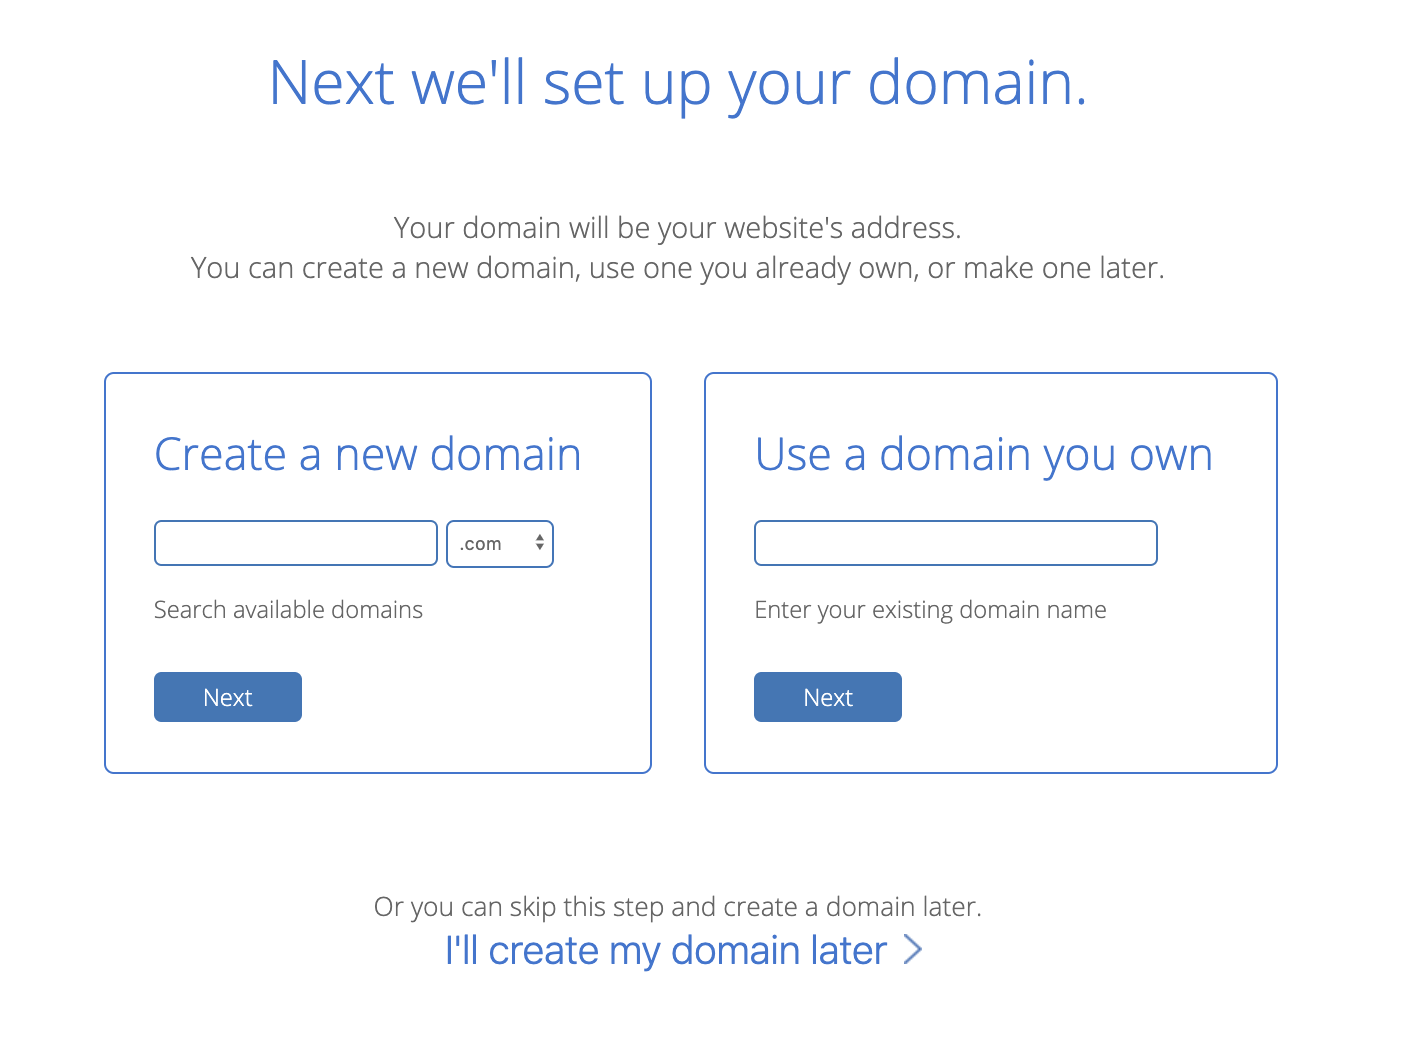
Here’s where it gets tricky. You’ll need to choose a domain name as similar as possible to the name of your company, but with over 1.8 billion websites out there today, your company's name might already be taken.
If your ideal domain name is already taken, consider using a different extension. I’d advise you to use one of the three most common extensions if you can: .com, .net, or .org. However, if it makes sense for your business, you might want to check out an alternate extension like .us or .shop.
Play around with it. Once you’ve chosen and paid for a domain name, you’ll usually also get personal email accounts attached, so make sure you’re happy to use your domain name as your main online identity.
4. Choose a theme for your site.
Now, for the fun part.
Themes allow you to easily change the look and feel of your site without having to code HTML and CSS from scratch. Themes are made up of templates, modules, images, and global content that control your site's overall design.
On whatever platform you chose, take the time to browse through the selection of themes available. Many will come with a directory of free themes, where you can use filters or the search bar to find themes related to your industry, with a specific layout, and more.
There are some must-have features that every theme should have. For example, it’s important your theme is responsive, so your site will look the same on all devices. You'll also want to stay away from hard-to-read fonts or flashy backgrounds that could distract a consumer from understanding your core message.
Other considerations will be specific to your business and site. You might be looking for a static header or a slideshow header, for example. Or you may need a theme that comes with a front-end builder. Below are some questions you can answer to find the right theme for your site:
- Do you need a variety of layouts or just one?
- Are you looking for a theme with built-in social media widgets or any other functionality?
- Would you like to install a demo site or start from scratch?
- Do you want to purchase a theme that includes its own theme builder?
Ultimately, no one knows your business better than you. Take the time to consider which theme would best represent your brand and most likely appeal to your ideal demographic.
When in doubt, you can’t go wrong if you choose something clean with straight lines and a limited amount of text. If you need some inspiration, check out 27 of the Best Website Designs to Inspire You in 2020.
If you can't find a free theme that meets your exact specifications, try looking for premium themes in third-party marketplaces.
Once you've selected and installed a theme on your site, move on to the next step.
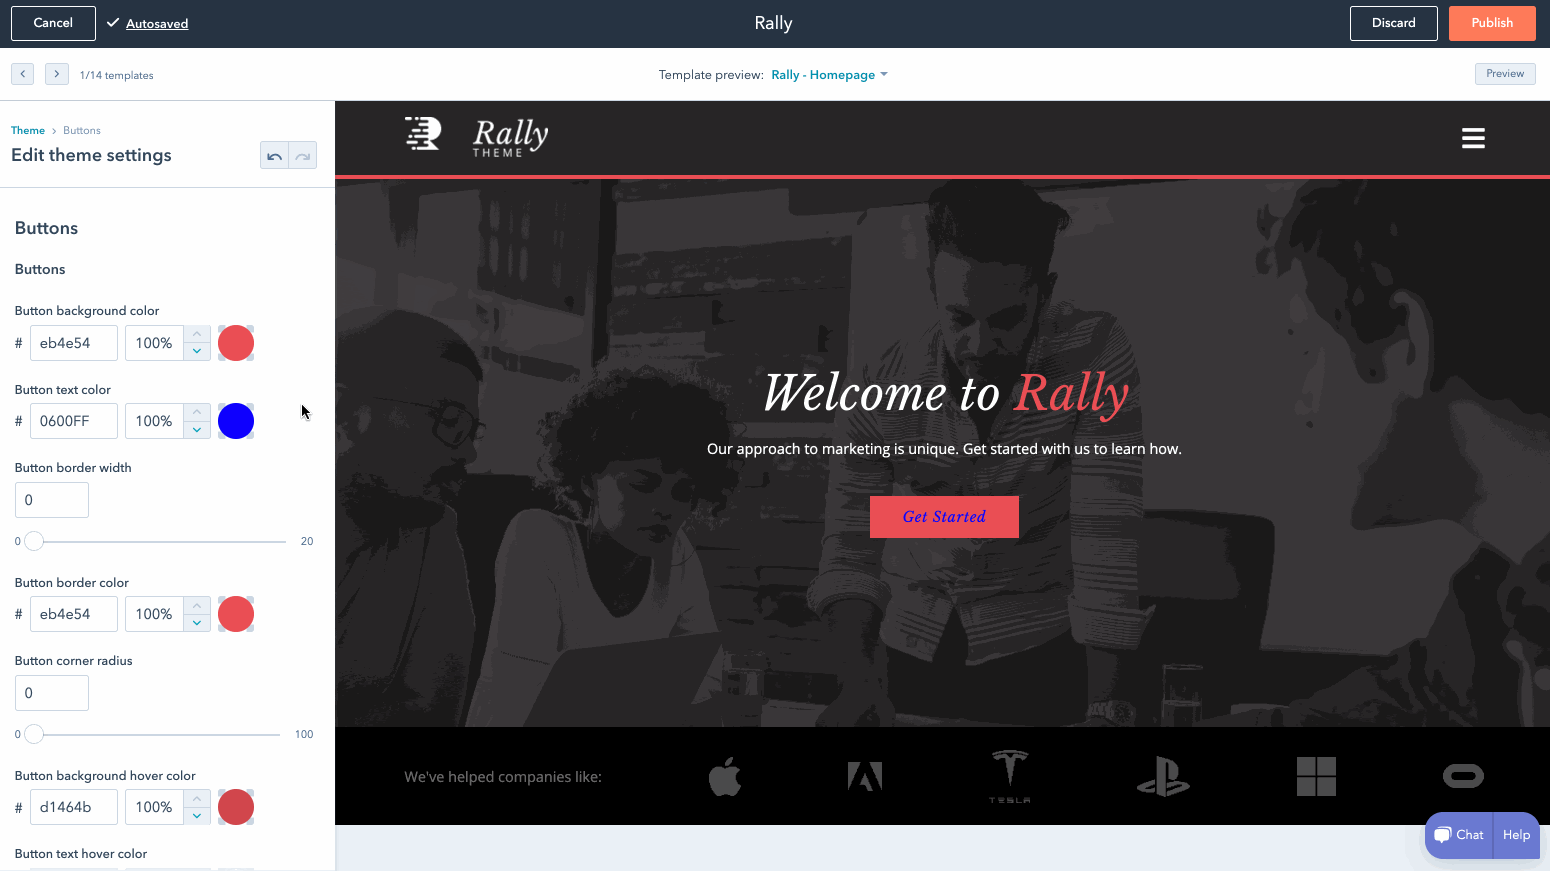
5. Customize your theme and templates.
Once you’ve chosen a theme, take the time to customize it and its individual templates. Your site’s design and functionality is your chance to persuade an audience to take a closer look. It’s imperative your design makes sense to your ideal consumer and works to enhance your product’s success rather than hinder it.
That's why you should think of your theme and templates as a starting point, rather than the final look. Depending on the website platform you've used to build your site, you'll have different degrees of control over your site's appearance.
On most platforms, you'll be able to choose a template and then change the color palette, replace the images, insert social media icons, add personalized forms and menus, and change the size, colors, and fonts of buttons.
On more flexible platforms like the CMS Hub, you'll be able to edit your theme's global settings to make sitewide changes. That means you can make changes to your font and other elements in one place and they'll be implemented across all pages on your site.
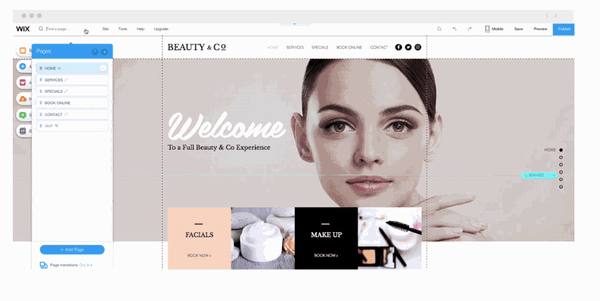
6. Add pages to your site.
It’s important to plan exactly which pages you’ll need to include in your site. While it varies business to business, I’d guess you’ll need at least a homepage, an “About Us” page, a “Services/Product” page, and a “Contact Us” page.
You should also add a blog homepage. I might be biased, but there are serious benefits to business blogging. For example, websites that feature a blog are 434% more likely to be ranked highly on search engines.
While every platform is different, it’s typically easy to add and remove pages on whichever platform you use. Let's take a closer look at the process on WordPress, for example.
- Start by logging into your WordPress dashboard.
- On the left side of the screen, click Pages > Add New.
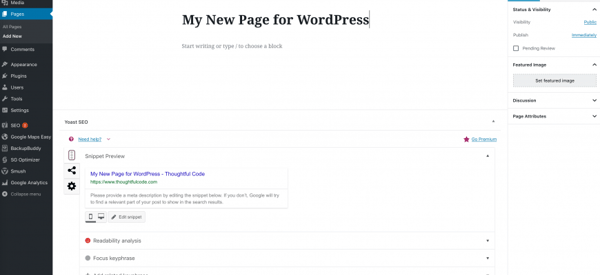
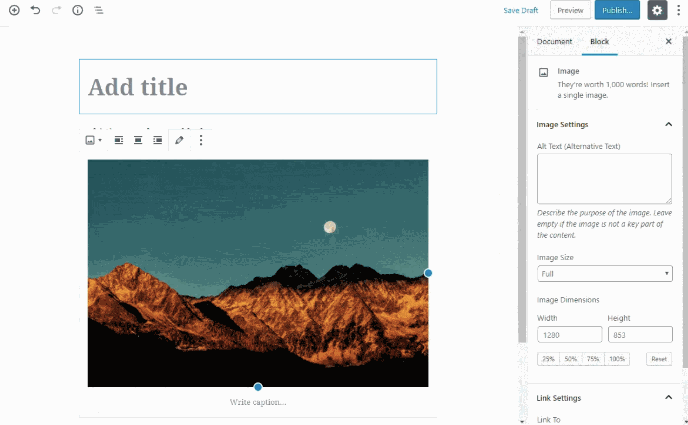
- You can add text, insert images, embed videos, and make any other changes you like.
- When you're ready, click Publish.
Once you've decided what pages you need on your site, make sure to add them to the navigation bar of your site. You can rearrange page topics any way you want, or combine them.
You can visit other company websites within your industry to get ideas for how to organize your navigation bar, or which pages to include and exclude if you're unsure.
7. Write content.
This is arguably the most important step. Now that you have your pages set up, what will you put on them?
I’d suggest writing rough drafts for pages like your “About Us” page and landing page. Talk with coworkers and stakeholders — what message do you want to put out there? What tone do you want to set? Should you make jokes and be funny, or aim to be more inspirational?
If your online audience stumbled across your site, what questions would they have first?
Imagine your website is your only chance to have a full conversation with a potential customer. The home page is the preliminary introduction: “Hey, we do XYZ.” Your “About Us” page digs deeper: “We are XYZ.” And your products or services pages are your big push to the finish line: “You want to work with us? Great, here’s how you’ll benefit.”
During this stage, it’s imperative you do your keyword research.
For instance, if you’re selling eyeglasses, and you notice “retro eyeglasses” has more monthly search volume than “vintage eyeglasses,” you might use this research to steer the direction of the content on your site.
If you’re stuck, check out competitor’s websites to gauge what other companies in your industry are doing.
8. Fill in general settings.
Once you’ve filled in your pages with the heavy-hitter content, you can still increase your search visibility by adding SEO elements to each and every page.
On your pages, you should include:
- Page titles
- Headers
- Meta descriptions
- Image alt-text
- Structured markup
- Page URLs
- Internal linking
- Mobile responsiveness
- Site speed
Make sure you include a site title and tagline in the “Settings” of your website building platform. Go through, and check out the URLs — are those optimized for search?
Each of these elements are essential to your on-page SEO. They not only help to tell Google about your website and how you provide value to visitors and customers — they also help optimize your site for human eyes as well as search engine bots.
Any platform you're using to build your site should make it easy to optimize these elements on every post and page. With Wix, for example, you can add image alt-text, meta descriptions, headings, and custom URLs right in your content editor.
9. Install add-ons.
Lastly, take a look at your site and figure out what you’re missing. Ideally, your platform will offer all the add-ons you need to extend the functionality of your site.
It's important to note these add-ons might be called apps, extensions, modules, integrations, or plugins, depending on the platform you use.
If you're running an ecommerce site on HubSpot, for example, you might use HubSpot's Shopify extension. Or, maybe you want to ensure your WordPress website is secure, to protect client data. In that case, you might download the Wordfence Security plugin for firewall protection against attacks, malware, and other threats.
If you're lacking out-of-the-box features for security, SEO, image compression, and social media, check if your platform offers an app or integration to add that functionality to your site. It's much easier to do all this work in one place rather than having to log on to several disconnected platforms.
Let's say you've browsed your platform's directory or marketplace and chosen a few add-ons you think will take the effectiveness of your site to the next level.
Installing these add-ons will vary from platform to platform. To give you an idea of how long the process will take, let's walk through the process of installing an app from the HubSpot marketplace.
- In your HubSpot account, click the Marketplace icon in the main navigation bar.
- Under Manage, select Connected apps .
- Click Visit App Marketplace.
- Use the filters in the left sidebar to browse for an app.
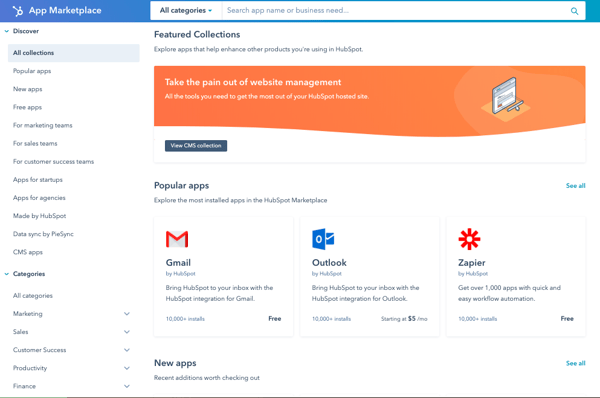
- Click on an app to see more information.
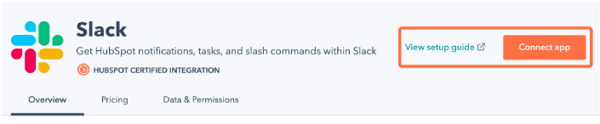
- On the right, you can review the details of the app. Under Requirements, check whether or not the app is compatible with your HubSpot subscription, and see if there are any app-side subscription requirements.

- When you're ready, click the Connect app button in the top right corner of the screen.
Once you’ve completed these nine steps, just click "Publish" and your site is ready for use.
How to Make a Website with HubSpot
Lastly, let’s take a look at how to make a website with CMS Hub. If you're not using HubSpot already, you can access a free trial of HubSpot CMS. If you’re already using HubSpot’s CRM, it probably makes the most sense to build a website within HubSpot to integrate all your sales and marketing needs in one place.
HubSpot CMS offers a variety of plugins and extensions, themed templates, and sophisticated tools for SEO analysis.
If you want to build a website with HubSpot, it’s easy and intuitive. Here’s how:
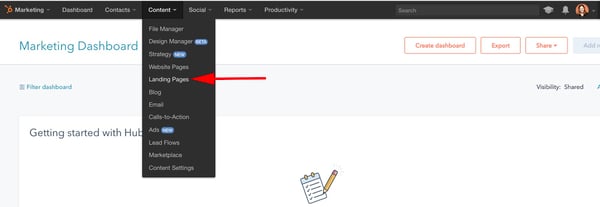
1. Create home page.
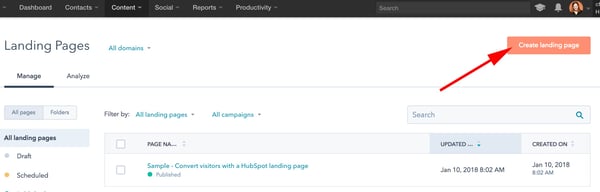
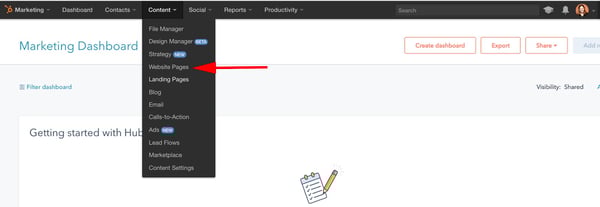
Within your HubSpot portal, click “Content” on the dashboard at the top of your screen. Then, click “Landing Pages.”
After that, click the orange “Create landing page” button and name your page.
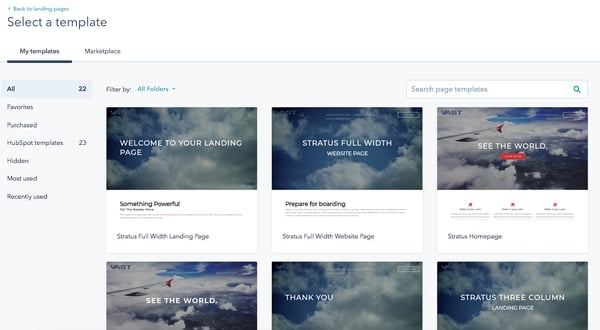
2. Select a template.
Now, you’ll be taken to this “Select a template” page. Scroll through your options, search page templates, or check out the Marketplace. When you’ve found a template you like, select it.
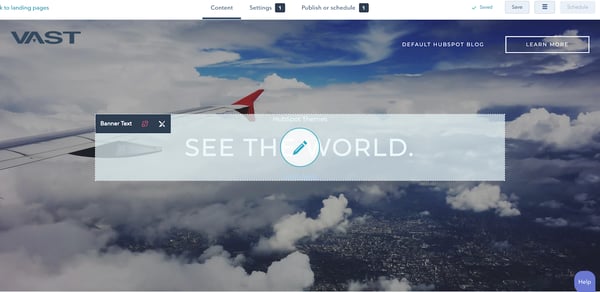
3. Edit the modules.
This is your landing page. You can scroll over text boxes, images, or other modules to edit them. In the below picture, I scrolled over the “See The World” Banner Text, and when I click it, it allows me to edit that text.
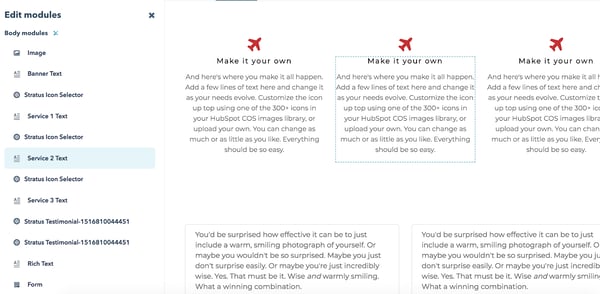
You can also click the “Edit modules” tool on the right side of your screen and edit from there. For instance, I selected “Service 2 Text”, which directed me to the “Make it your own” paragraph on my landing page. You can add text, images, sections, forms, and more from the “Edit modules” section.
4. Create other pages on your website.
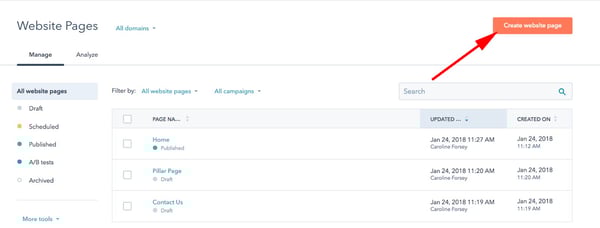
When you’re happy with your landing page and want to move on, go back to your dashboard and click “Content” at the top of your screen, and then “Website Pages.”
Here, you’ll click the orange “Create website page” button and name your page, just like your landing page. Then, you’ll be taken through a similar process of choosing a template and adding content. If you want a more in-depth tutorial, check out a quick tour of website pages.
5. Incorporate social media accounts.
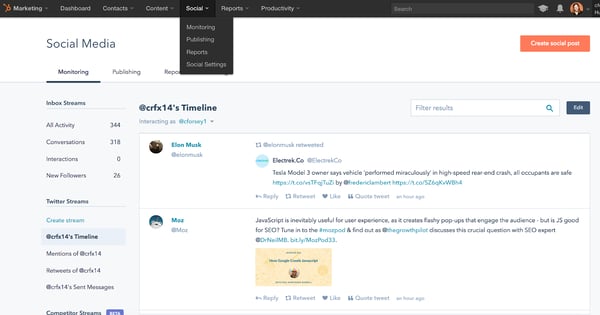
If you want to incorporate your social media accounts, click “Social” on your dashboard. You can monitor all your social media accounts and also publish tweets, Facebook statuses and comments, Instagram pictures, and other content straight from your HubSpot dashboard.
6. View analytics.
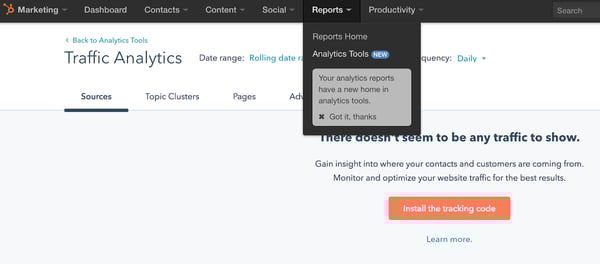
If you want to check out your site analytics, go to “Reports” and then “Analytics Tools”. You’ll need to install the tracking code, which is easy to do within the HubSpot platform by clicking the orange “Install the tracking code” button. If you’re still unsure, check out how to install the HubSpot tracking code.
7. Add blogs to your site.
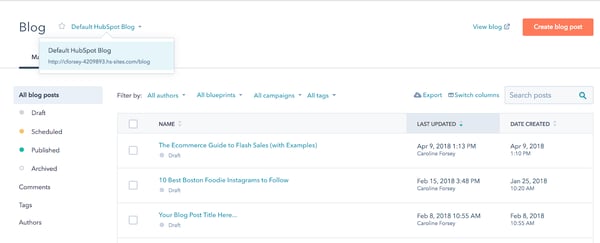
If you want to write blog posts, go to “Content” > “Blog” on your dashboard to create, publish, and monitor your website’s blog posts.
This is a fairly broad and general overview to get you started building a website with HubSpot, but there are plenty of more in-depth features and tools you might want to explore with a HubSpot specialist, or by checking out some articles on academy.hubspot.com.
Ensuring a Smooth Launch
Once you're done building a website via the CMS Hub, it's important to check that you're not missing any crucial elements or going live with any glaring errors. Once you've gone through this list above and feel like you're close to a website launch, read this blog post for a detailed list of things to check before your go live.
And don't forget to check out our CMS Hub, as mentioned above. It will help you accomplish most of the things on your website launch checklist without you even knowing you. You can find a free trial here.
Editor's note: This post was originally published in May 2018 and has been updated for comprehensiveness.
No comments:
Post a Comment